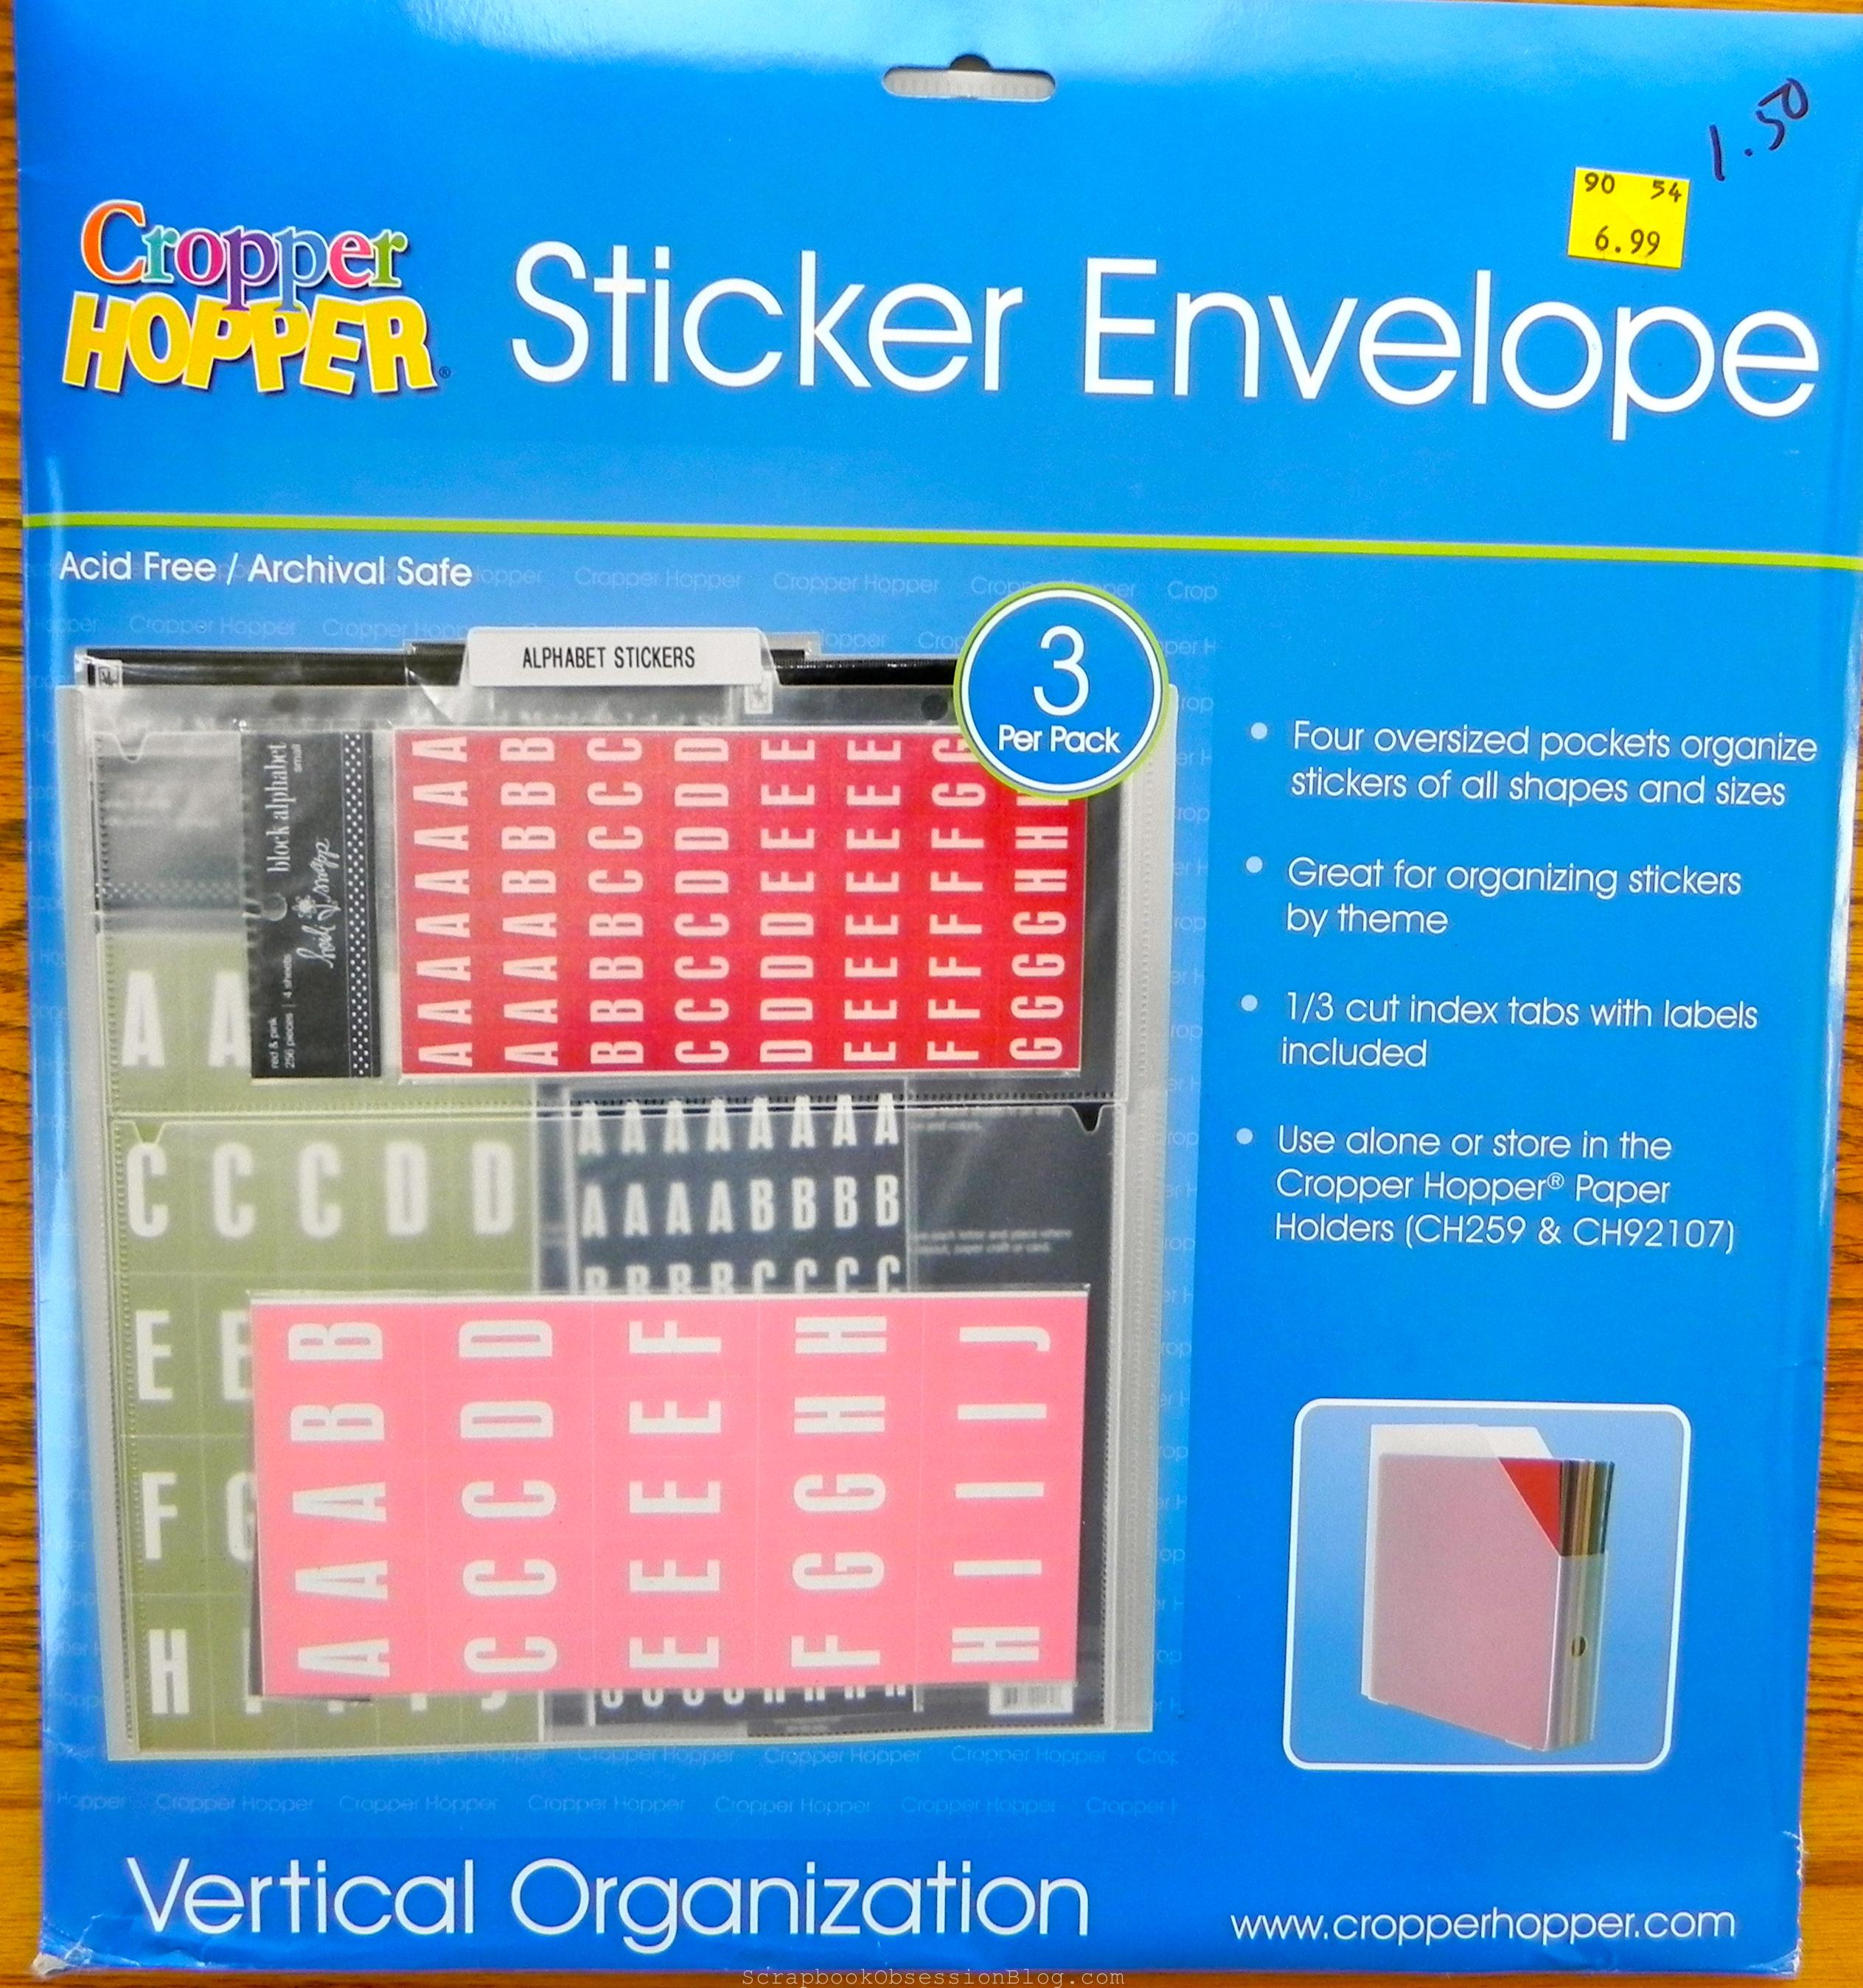
A couple of months ago, I found a great deal on these Cropper Hopper Sticker Envelopes.
As you can see, they were normally $6.99 marked down to $1.50 so I did what any bargain-lovin’ scrapper would do: I bought them all! There were 10 packages so I got 30 Sticker Envelopes for $15 (instead of $70 at full price). WAHOO!!
They sat in my scraproom for a while because I wasn’t sure how I wanted to use them. I guess they’re intended to just store stickers, maybe by topic? But that ain’t how I roll, baby.
I thought about making up kits with them. You know, pull all the paper, stickers, alphas, embellishments, and photos for a single project. But in the end, I decided to use them for storing a whole collection.
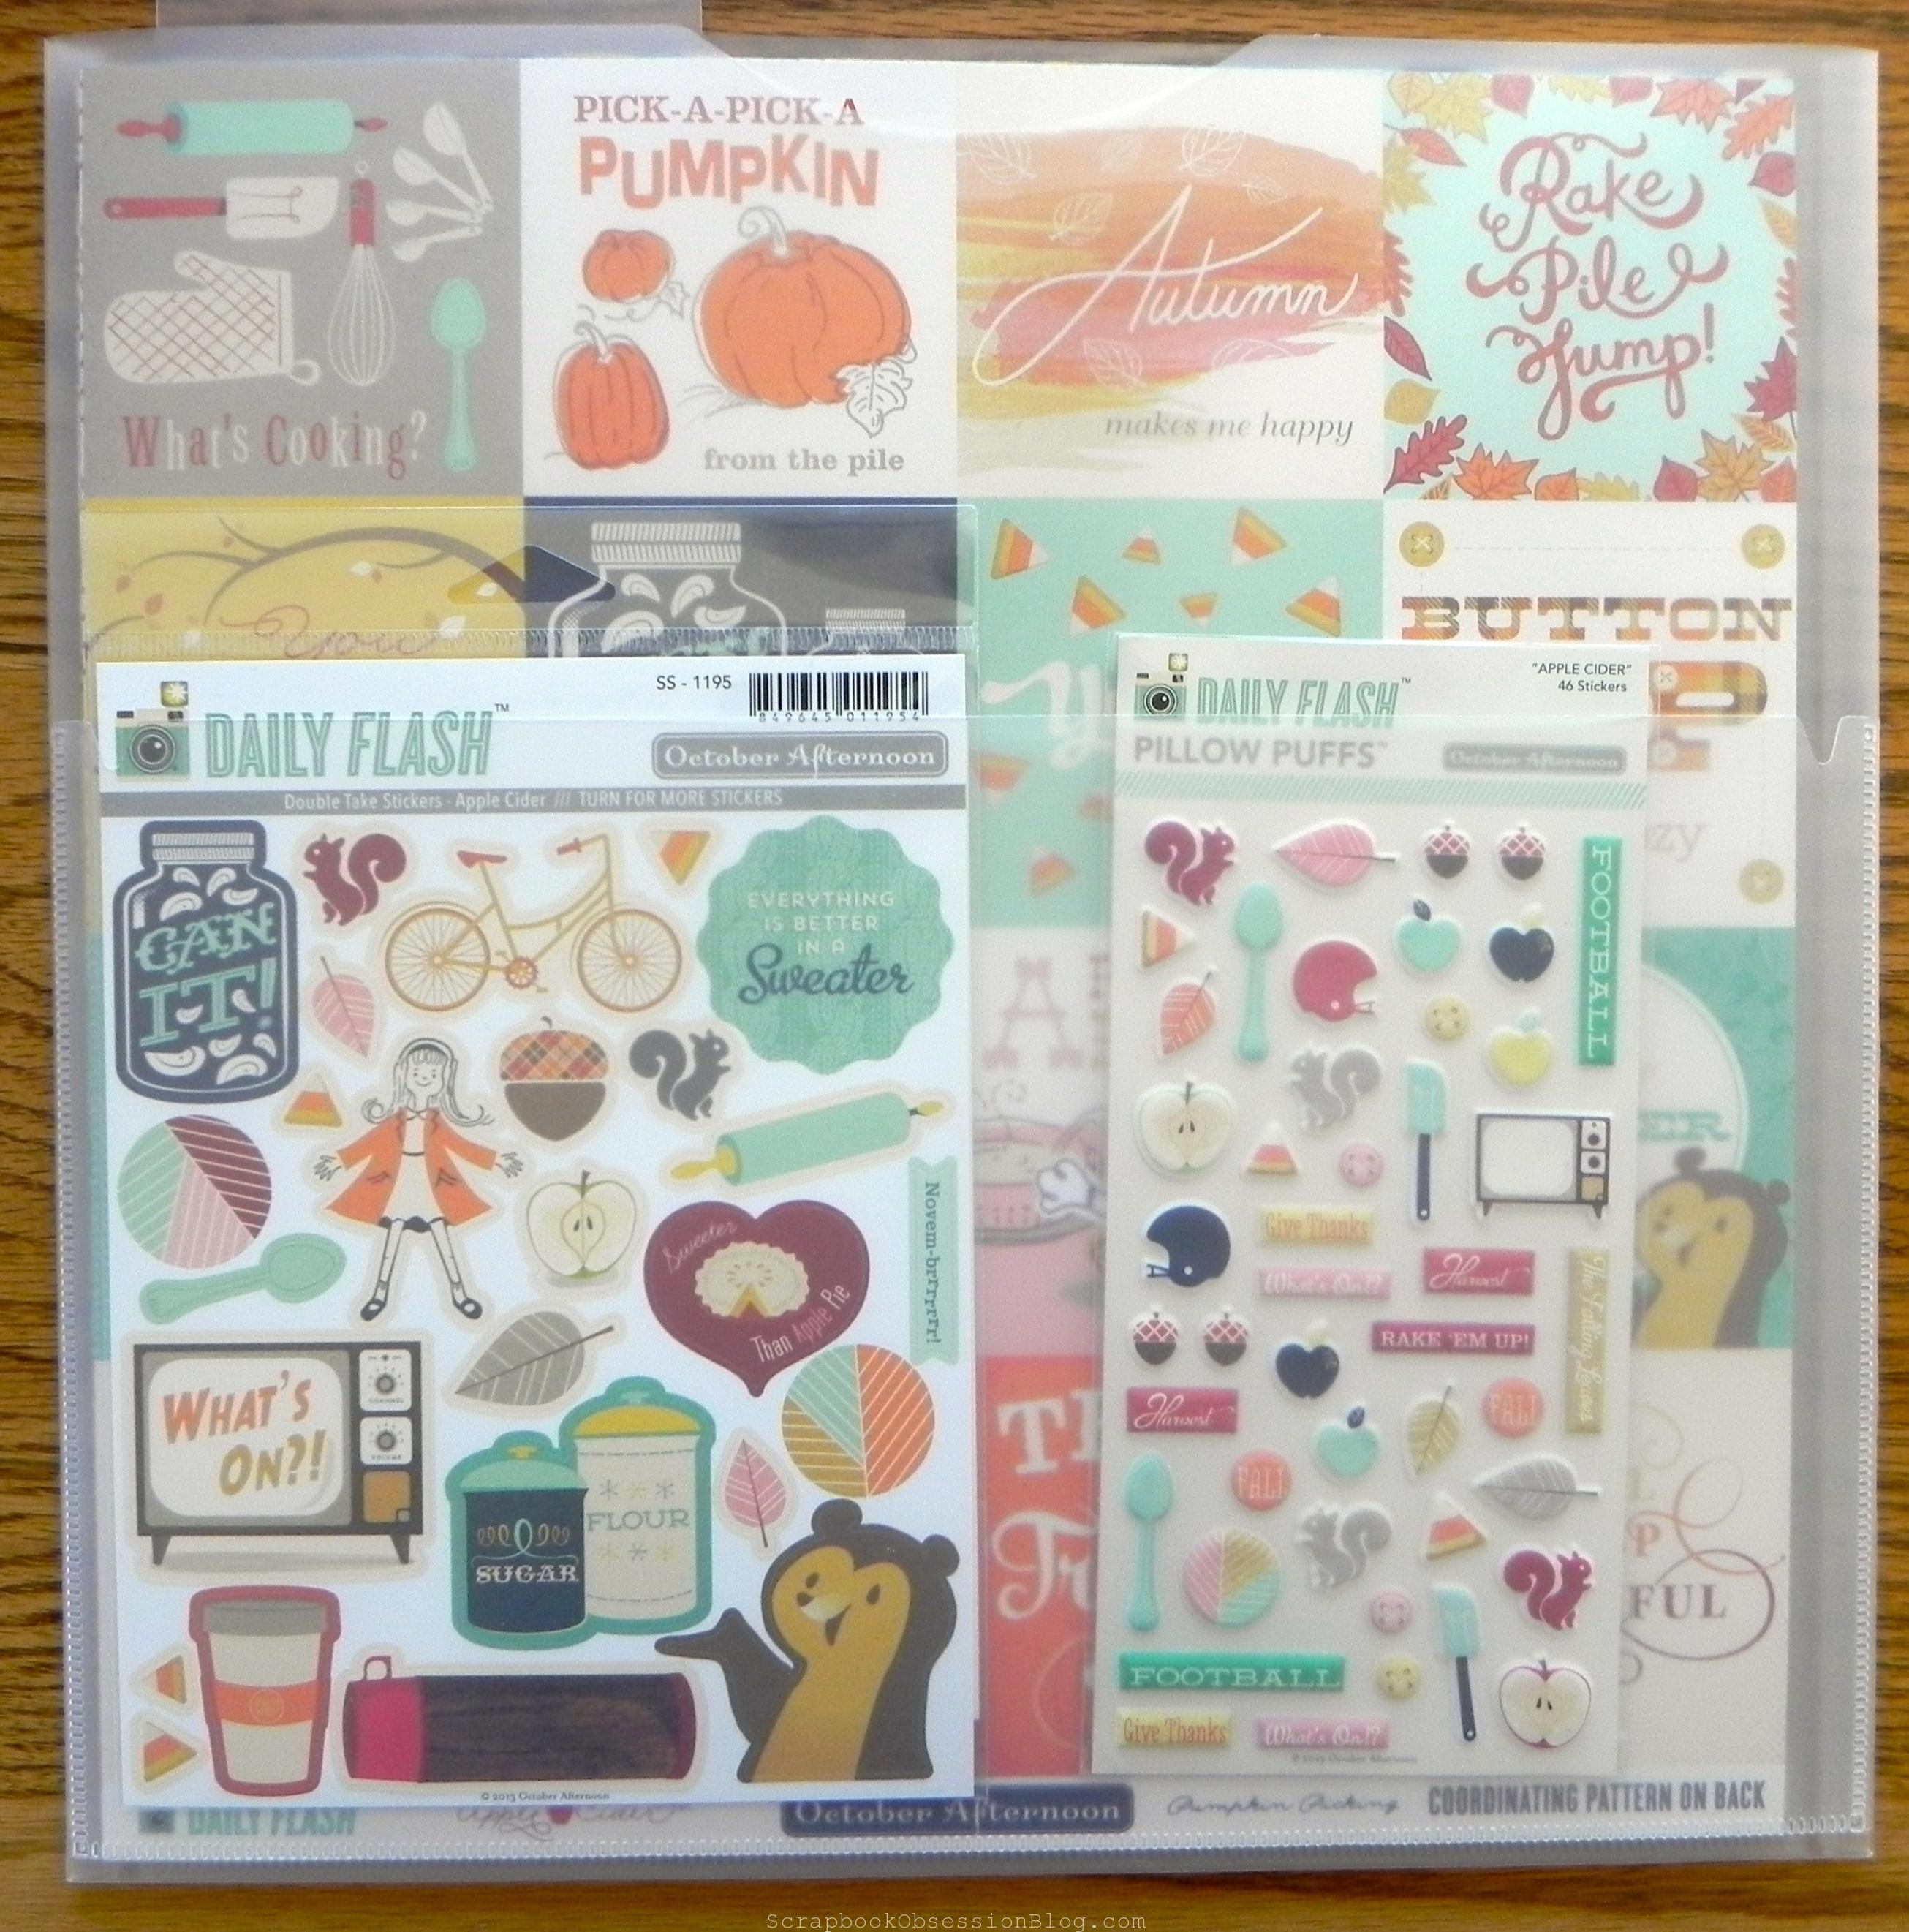
In this case, I stored all the October Afternoon “Apple Cider” collection that I talked about HERE.
This is what it looks like from one side:
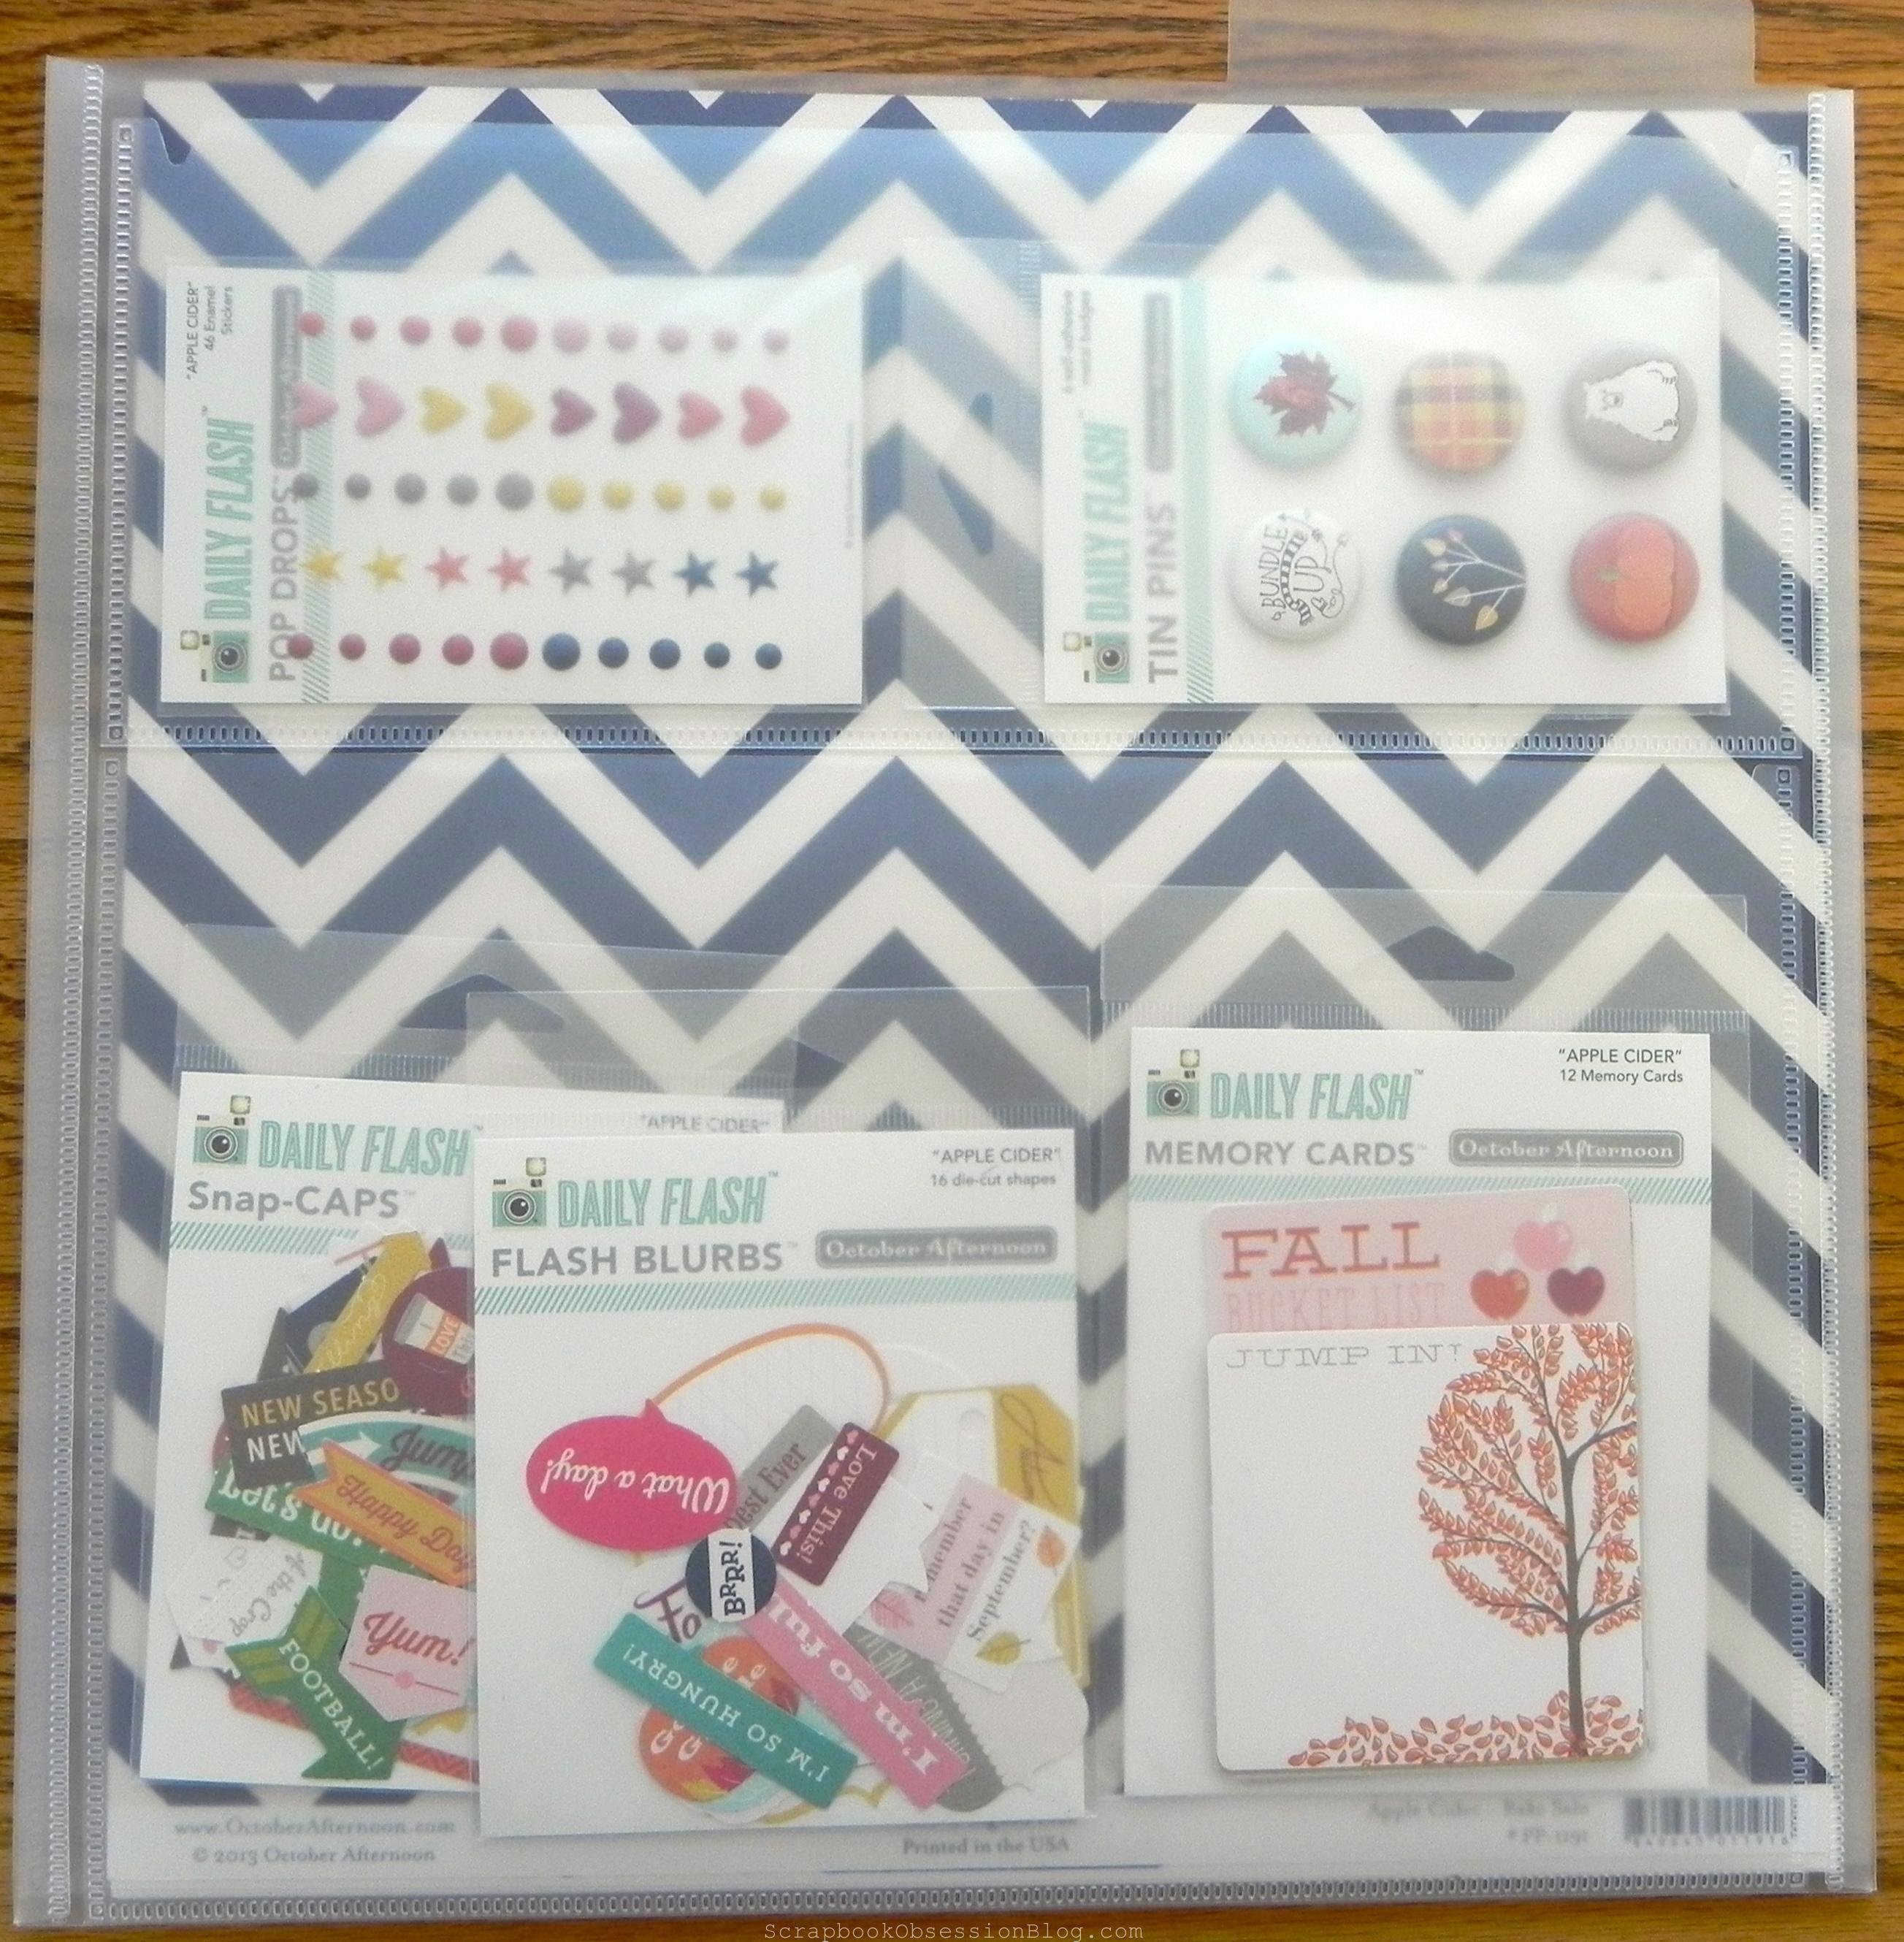
And here is the other side:
All of the 12×12 papers are in the large inside pocket. The stickers and embellishments fit so nicely in the outside pockets. I’ll put a label on that top tab. {For everything in my scrap space, I used an older version of this Brother P-touch Labeler – it’s perfect!}
I love that I can see the whole collection at a glance. I also love that these pockets fit inside my Cropper Hopper paper holders, which I sort by manufacturer. So of course this Sticker Envelope goes into the October Afternoon paper holder. I use an older version of these Cropper Hopper Paper Holders.
Like I said, I store most of my scrapbook stuff by manufacturer. For some lines, I just have paper but for others I have paper + embellishments. I’ll be going through my CH paper holders and transferring those full collections into these. It’ll be great to just grab a Sticker Envelope and get to work :)
I don’t belong to a scrapbook kit club anymore but if I did, I’d use these Sticker Envelopes to store new kits when they arrived. It would be helpful in “killing a kit” I would think. You could see each little piece and more likely use it. Then when most of the kit had been used, you could separate the items into your regular storage methods. “Oh no! The Sticker Envelope is empty! Whatever will I do?! Ah, time to buy a new kit!” Heh.
I got these Sticker Envelopes at Beverly’s Crafts. If you’re in California, you can check HERE to see if there’s a store near you. Maybe your store will have them, too. In mine, they weren’t in Scrapbooking but were in the big Clearance section.
What do you think? How do you store your collections? Do you keep them together or separate them out into other categories? Would love to hear your method!
I’m slowly making progress on the big overhaul of my scrapbook room. If you’re not caught up, you can read the PROLOGUE and PART ONE, if you like :) But the Prologue is important reading; it’s where I tell you what happens if you make a smart ass comment about how much crap….erm, STUFF I have. Yes, I have a lot of paper. No, you can’t shop here. Yes, I have a life. Blah blah blah….
So, I’ve done lots of furniture moving. This is going to take awhile, so get comfy…
1. Unloaded everything from the desk – underneath, off the top, and in the drawers – and moved it about 2 feet closer to the sliding glass door. I didn’t repack the office supply and computer-related stuff I had in the desk cupboards; need to find a new home for all that. It’s in a pile here somewhere…
2. Unloaded all the DVDs, videos, and board games from the oak cabinet and moved them into a cabinet in the guest room/new play room. Moved a bunch of toys that were along the wall into the new play room. Moved the oak cabinet to the wall where the toys had been. Moved the Scrap Rack to the oak cabinet (temporarily, I think…). Moved office supplies, and office machines (fax machine, transcription machine, etc.) from guest room to bottom of oak cabinet (where movies and games had been). This cabinet is going to be Office Stuff Central…unless I change my mind.
3. Emptied out the legal filing cabinet, moved it from a back wall to align with one edge of the L-shaped desk, and refilled it with the same stuff I had in there before, which are greeting cards, school supplies, and more home office stuff. I gathered scrap magazines and idea books from various places around the house and piled ’em up.
As you can see, it’s time to purge these again. I usually do this about once a year but, yeah, it’s been awhile. A friend that I scrap with recently finished her project of pulling pages and ideas from her magazines and organizing them into page protectors in a binder. I’m so jealous….it was great! So I’m deciding now if I have the time, patience, and devotion to do the same thing. Purge or make “the perfect idea binder,” THAT is the question.
As for all those idea books….I don’t think I’ve EVER gotten rid of an idea book. Something about throwing away a book that I paid $15 to $40 for is much harder than a $5 magazine. But I should look through all my idea books and maybe toss some older ones. I’ll bet I don’t even “scrap like that anymore” for some of them, huh?
4. Moved the table that I’d been using for scrappy stuff (okay, to dump things on…) over to the area by the storage cubes. This will be the famous Homework Table.
5. Moved the couch and coffee table from in front of the desk to behind the desk by the back window. The original plan was to put it flush against the wall and lined up directly under the window (I’m all about symmetry, baby!). But once I got it there, the couch seemed kind of squished over into the corner and the coffee table was somewhat blocking the walkway to the back part of the room. So I tried the couch at an angle, and I liked it. Bonus: It creates a hidey space behind it for ugly stuff, lol. And I felt so “HGTV” about it, too.
6. Unloaded just about everything from 10 Store in Style cubes (see couch pic above), moved the cubes to the opposite end of the room, and reloaded them pretty much the same way. The SIS cubes are now on the wall that the oak TV cabinet used to be on. This is the area I talked about where I have to keep a walkway to get to the slider, so the cubes are a good thing to put here. They fit nicely and I can stack more on top someday if need be (God forbid!).
I first thought about configuring them like this, with a kind of “turn the corner” at one end….
…but decided not to. The positives were that it would be a little different-looking, and it would create a handy little empty space back there in the corner to store crop totes or something. But the negatives were that it made the walking path a bit too slim, and put the cubes right next to the cord for the blinds. And when I put embellishment jars on top of the one by the door, they would block the light switch. No super big deal, but I just decided to go with putting them all flush against the wall, like this…
All this furniture moving happened way back on 9/10 (it’s now 9/27!), so when I say “making slow progress,” I’m not exaggerating. It took me awhile to remember and write all this down, the order I did things in. It was quite the feat of engineering to move things AROUND the room while still having everything IN the room. I apologize for any dark photos but most of my madness occurs late at night after everyone has gone to bed. Man, you should’ve seen the wide eyes of my husband and kids when they came out the morning after all this! They were like, “You moved ALL that by yourself!?!? The couch???” and I’m all, like, “Desperate organizers take desperate measures.” (Like, totally…I did all that “like” stuff just to annoy you). Then the daytime photos are overly bright because of the sun coming in all the windows, so I can’t win, lol.
Once the furniture was in place, I’ve just been slowly putting things away, whether within this room or the other parts of the house where they belong, and below is what the room looks like as of today.
Down there is the new back half of the room, with my cool slanty couch, and my corner of chaos. The couch was my dad’s before he passed away so it’s sentimental. Luckily, it’s also functional so I have an excuse to keep it always and forever. That big tub is all the paperwork from my two scrapbook businesses, MEMORY WORKS and Calla Memories. I can get rid of most of it. I just need to go through it and save some paperwork for tax records and such.
The white shelving unit has all my mini album stuff – supplies and some completed albums – but I want to get rid of that shelf and find another way to store my mini album kingdom. That’s actually a shoe shelf so I’m hoping to then move it into my closet and use for, oh, I don’t know…..SHOES???
The basket on top of the white shelves contains letter stickers, which were all nicely sorted by color at one time, and easy to thumb through when I scrapped. Then….I discovered THICKERS. Dun dun dun dunnnnnnnn! I use Thickers lots and I buy Thickers lots. I have a Thicker addiction and I hope there ain’t no cure! But, yeah, I need to go through that basket and purge some old alphas I’ll never use. Like the first major set I bought oh so many years ago, of punch out alphas (I think they were by COLORBOK) in every color and pattern known to man (including plaid and leopard!), in a bubble font, a lollipop font, etc. Eek. Perfect for the kids to use on school projects but NOT for my scrapbooks).
The black boxes are POWER SORT BOXES from CREATIVE MEMORIES and that’s where most of my printed photos are. But photo and memorabilia organization is an ever-changing and never-ending project/battle for me. I’m not even gonna’ GO there right now. The white cubes they’re in are ITSO brand from TARGET. As you can see, I had more photo boxes than Itso cubes, so I bought another Itso from Target when they were on sale recently. (If I remember right, I paid $12 instead of $20). You can see it on my desk in the next photo.
Below is my mess of a desk, and my flooded floor (flooded with scrap crap, that is). There’s the new Itso cube, and one of my new 3-drawerJET MAX cubes. Actually, “new” is relative since I’ve collected 3 of these units over time from MICHAELS using 50% off coupons. I’ve just never put them together, knowing I had this big re-org project coming up. Recently I assembled one and, man, are they a pain in the asset! Don’t get me started. If you’ve put these together, you know what I mean. (I feel sorry for THIS poor scrapper!) I’m dreading the assembly of the remaining 2 but I shall do it, I shall.
I’ve done a little more work on the Wall of Cubes and this is how they look as of now…
The cubes themselves were already pretty organized before I started this crazy project, as they contain the staples of my scrapbook world: Bazzill cardstock sorted by color, die cut/shaped papers, extra page protectors, scrapbook projects, etc. Most of the vertical files by CROPPER HOPPER are sorted by manufacturer and include patterned paper and all embellishments from that company. They could use some tidying but for the most part, the vertical files are good as they are. The gingerbread jars on top, however, are another story. When I first got them way back when on Craigslist (read about it HERE), I had them organized pretty well, but over time I lost control and just started throwing new things in with no rhyme or reason. I’m going to do a post soon about using 2 of the jars for my chipboard letters. There’s one full of flowers, and the rest I plan to use for random embellishments by color. I also put my ribbon jars back on my cubes…ribbons are sorted by color. I love my cubes and jars…they’re my favorite part of my scrapbook room. Can’t wait til I get this part totally done! My pretties, LOL…
So, that’s where I’m at for now. Thanks for sticking with me. I promise I’ll get done eventually, but real life has to come first, so it’ll continue to be slow progress. But progress is progress, right?
Okay, part 2 of getting organized with the Cropper Hopper goodies I recently bought at Tuesday Morning. Here is what I started with…a bunch of Michael’s $1 acrylic stamps in baggies, kinda sorted by Series, in a 12×12 Iris drawer. NOT a good arrangement. Again, every time I opened the drawer, it got jammed up. As anal as I was about keeping the sets together when I first started “collecting” them, now I don’t care and would rather have them sorted by topic.
And how easy was that? I cut index cards down a bit to act as dividers. Nothing fancy, just wrote ’em in by hand. I cut the tops off of each stamp package to allow for easy use. I had originally planned to take them out of the package altogether but when I tried that, the stamps alone were so little, it seemed like they sunk way far down in the drawer. Man, I was SO ready to throw more packaging away, LOL!
Here’s what it looks like with the drawer closed. Nice. Compact. Dust free. Love it. I’m hoping I’ll use them more now that they are so nicely organized.
That drawer is pretty packed though, so now the question is, “Do I buy more storage drawers…or quit buying Mike’s stamps?”
If you know anything about me, you know the answer to that question…{wink}
In THIS post, I showed you the new Cropper Hopper storage I got. I decided to use the binder storage to get my cardmaking supplies in one place and out of the Iris drawers I had them in. The problem with the drawers was mainly that the blank envelopes and cards would get jammed when I opened and closed the drawers. Also, nothing stacked in there very nicely and it shifted around, not staying very organized. So here is a photo of what I started with – 2 Iris drawers of cards, envelopes, rub-on books, stamped images, etc.
Actually, I realized when I was all done (or thought I was!), that there was another Iris drawer so it's not pictured here but the finished product has THREE drawers worth of stuff, yay!
Here is how one side ended up, with most of the blank cards and envelopes in the 4 pockets. I like how they have closing tabs so they don't get all yucky or dusty.
Here is how the entire opened binder looked when I was done.
Here is just the right side, with larger cards/envelopes, card sentiment stickers, etc. To make it work for my stuff, I had to cut out some of the dividers. The top section started out with 12 small sections and I cut out 6 of them to create a space large enough for my items. In the bottom section, I cut out the 2 vertical dividers (it originally had 3 sections) to accommodate my larger cards and envies. I just snipped them out with scissors right along the crease, careful to not make holes.
Here's the trash pile when I was done, from taking everything out of it's cellophane packages, ribbon off spools, etc. To me, that is room SAVED, baby!
I hope you enjoyed my card making stash makeover. Have you done something similar?
And stayed tuned...tomorrow will be my Mike's stamps storage revamp!
Made my monthly trip to The Big City and here is what I found at Tuesday Morning…
There were a lot of ANNA GRIFFIN packs – huge ones with 12×12 paper and tons of embellies to mini album kits.
Here were some fun EK SUCCESS punches that were very tempting (but I resisted…can you?). These ones are a pacifier, arrow, and speech bubble. There were a few other shapes, too.
For me, this is where I hit the motherlode….CROPPER HOPPER STORAGE !!! I had always wanting these when they first came out because I love vertical bookshelf storage for my scrappy stuff. I own stock in CH VERTICAL PAPER HOLDERS, ya know. But these items were out of my budget (because I am super cheap, yeah).
But I picked up the 2-drawer/4-pocket binder ($8.99) which I plan to use to organize my card-making supplies. I don’t have a ton but right now they’re in some Iris drawers and not very well organized. The 3×3 embellishment drawer ($2.99) will be the perfect way to organize my Mike’s stamps finally! I’m really excited about that one. They’ve also been stacked in an Iris drawer…til now, LOL!
Here you can see the retail prices, and what a great deal Tuesday Morning has on them…
Here is what the inside of the pocket binder looks like.
When I get some schtuff inside my new storage, I’ll post pics and see what you think. Have you found any good deals at TM lately?
PS: Stay tuned for the next episode of Shopaholic Obsession….er, I mean….Scrapbook Obsession….when I’ll show you what’s new at Mike’s and what I picked up there….
Update to this ORIGINAL POST. Sorry, it’s not very well written below…just kind of stream of consciousness of what I’m doing, what questions come up, and what I’m learning along the way.
Here is the progress I have made so far:
~ Gathered all recently ordered customer products. Sticker on each one with customer’s name. Checked items received off order forms and noted if money due. Boxes into car for delivery to customers (wish I could readily find all of their addresses and phone numbers to call and tell them I’m coming by after work).
Result/Learned: Had about 4 large boxes with customer stuff that is now outta’ here! Wow, that already made a big difference. Unfortunately, something came up after work and I wasn’t able to deliver tonight but, hey, the boxes are outta my scrap area!
~ Gathered all Christmas card related items, finished Christmas letter (yeah, I know it’s late!), decided to forego handmade cards for everyone on my list and send them to scrapper’s only, started entering address/phone/e-mail information into Address Book on my Mac laptop while I watched the finale of the Biggest Loser. Filed from stack of 12×12 papers. Put random Mike’s stamps into stamp drawer. Need to inventory stamps so I don’t double-buy. Need to separate stamps that I’m giving for crop prizes from my own stash, and put them into my prize box. Prize box could go in a closet since I only access it on crop days or to drop new prizes into?
Result/Learned: Not having all of my customer and personal addresses computerized really costs me lots of time, aka time that I could spend on keeping my space organized. Mac Address Book will be wonderful once it’s up and running. I can separate contacts into groups like scrapbookers, crop invitees, customers, friends, family, business, sort them by birthday month for prizes and greeting card lists, etc. For easy Christmas card addressing, Address Book even makes Avery labels! Ain’t technology great? It seems like I “never have time” to get things up and running, but when I do make the time, it’s SO worth it. And doing a boring organizing task is easier if it’s one you can take in front of the TV, LOL. I also learned that it’s okay to let go of self-imposed obligations (like 50 handmade Christmas cards) if it helps me keep my sanity. Do you beat yourself up sometimes like I do over these self-created issues? I mean, the people on my card list didn’t ASK for or expect a handmade card, did they?
~ Got picture frames out of boxes and put into hall closet with other frames. Plan to complete all re-framing AFTER the holidays.
Result/Learned: Things like photo frames shouldn’t come into my scrap area in the first place, and I gained a good chunk of floor space by moving them. I need to change my mindset that, “If I don’t see it, it won’t get done.” Even if I DID forget that re-framing is a project I need to do, I’ll still see the frames whenever I open the linen closet (duh!).
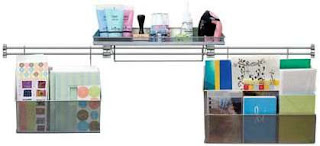
I’m so glad y’all are joining me, giving me tips, and/or just following our progress and cheering us on. There are more from CKMB (some of you posted both places ~ thanks!). Here is THAT THREAD if you want to take a peek. Scrapper-organizers are already making progress ~ wahoo! I’m jealous of Scrapperdays and her new Lisa and Becky Rail System. This isn’t Julie’s actual system, but a picture of one that she posted on HER BLOG.
You can see the Rail System HERE on the Cropper Hopper website (www.lisabecky.com). Here is another picture:
So, if you haven’t joined our Organization Challenge, please do! Just post below to make it official. Take Before photos so you can see how far you’ve come. If you’re shy, you don’t need to post here ~ but do ORGANIZE! It feels so good and will let you start the new year in a fresh, clean, and productive space…